Migrate from Mailchimp to ActiveCampaign

Written by Marcus Taylor - Marcus Taylor is the founder of Venture Harbour. He’s also an early-stage investor, advisor & the youngest Patron of The Prince's Trust.
Updated 10/02/2026
5 minute read
Despite the size of your business and the amount of data that needs to be migrated, the migration process can be a challenging task. At the same time, it's a great time to reassess your marketing strategies, identify what needs to be improved and consider new trends.
In this article, we'll walk you through the key steps of the migration process to help you migrate your customer data and share our best practices.
Before you start…
ActiveCampaign offers free migration to all users where they take care of migrating contacts, tags, custom fields, as well as rebuilding forms, templates, and automations. You can see what you’re eligible for on this page.
Take a look at the migration service and dedicated guide.
See what you’re eligible forExporting from MailChimp
Getting started
To get started, there are a few things that we recommend exporting from MailChimp:
- Your contacts (in CSV format)
- Your tags and segments
- Your reports
- Your templates
1. Export your contacts
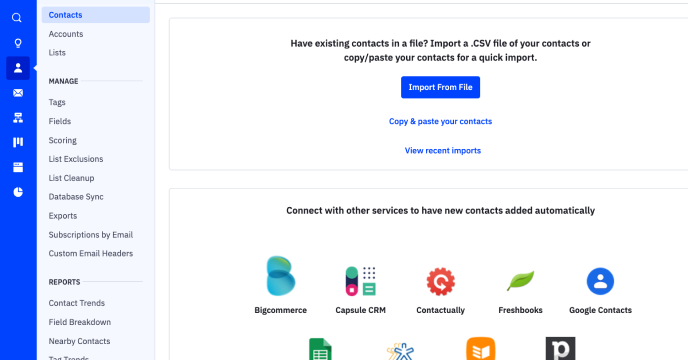
To export your contact list, click "All Contacts" in the left-hand menu. Under "Manage Contacts" you'll see an option to export as CSV. Click this and wait until your file is ready to download.
 You can export your Mailchimp contacts from the Audience page.
 2. Save your Tags and Segments
If you’ve used tags and segments, its recommended that you make a note of these. These will appear in your contact list export, but we recommend also taking a screenshot of the Tags and Segments pages as this will help ensure you have a like-for-like setup when you recreate these in ActiveCampaign.
3. Export your reports
One of the downsides with migrating to a new tool is losing your historic performance data which might come in handy later. We recommend both taking screenshots of the Analytics and Reporting pages, as well as exporting a CSV of all email campaigns for your future reference.
4. Export your templates
If you’ve custom-built your own templates in MailChimp, we’d recommend exporting these as HTML files from the ‘Email Templates’ page, as you can import these into ActiveCampaign later if you wish.
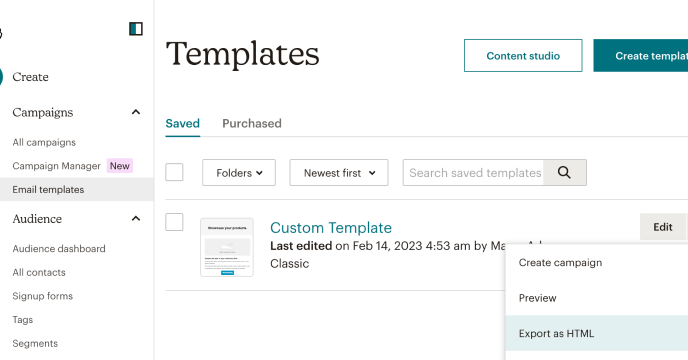 Remember to export any custom HTML templates you’ve made to keep your designer happy!
 That’s the essentials done! Of course, it’s worth doing a final check over your account as MailChimp offers many other features like surveys, forms, and automations that may be worth making a note of or exporting where possible.
The likelihood is that you’ll need to rebuild these in ActiveCampaign, but it never hurts to have some screenshots to reference once your MailChimp account is closed.
With that done, let’s take a look at moving your data into ActiveCampaign.
Don't close your MailChimp account yet!
To be on the safe side, we’d recommend waiting until you’ve used ActiveCampaign for 2-4 weeks before closing your MailChimp account.
Migrating to ActiveCampaign
Checklist
- Create your ActiveCampaign account
- Import your contacts
- Segment your contacts into lists
- Setup your templates
- Rebuild your automations
- Update your MailChimp templates for ActiveCampaign
1. Create your ActiveCampaign account
If you haven't already, create an account with ActiveCampaign.
Wondering how much ActiveCampaign is going to cost as you grow? Check out our free ActiveCampaign pricing guide.
See ActiveCampaign's pricing2. Import your contacts
The first step when setting up ActiveCampaign is to import your contacts. It’s generally safest to do this before you create any automations or campaigns, so that no messages are sent accidentally.
- Click "Contacts" in the left-hand navigation
- Click "Import" in the top right menu
- Click "Import File" and select the CSV file you exported from MailChimp
- Map the columns in your CSV to the fields in ActiveCampaign
- Select a list you'd like to import these contacts into (optional)
- Click "Import Now"
 ActiveCampaign’s three options for importing contacts
 A note on custom fields
When you import your CSV into
ActiveCampaign, there’s an option to add a new custom field for any columns
that aren’t detected by default. This is the fastest way to migrate any
custom fields you were using in MailChimp.
Once the file has finished importing you should be able to verify that the contacts were imported by clicking on ‘Contacts’ in the left-hand navigation.
Tags
If you used tags in MailChimp, you’ll notice an option to import these with your contacts. Some users prefer to start from a clean slate (particularly if their tagging system had become unmanageable) while others choose to preserve this data. This is completely up to you, and will likely depend on how you use tags.
3. Segment your contacts into lists
With your contacts imported, it's now a good time to segment them into lists. You could recreate the 'Segments' that you used in MailChimp or start from scratch.
We recommend keeping your lists broad (e.g. leads, customers, lost customers) so they're easy to manage. It's worth noting that ActiveCampaign allows you to send emails to segments of a list, so there's no need to be too grnular with your lists.
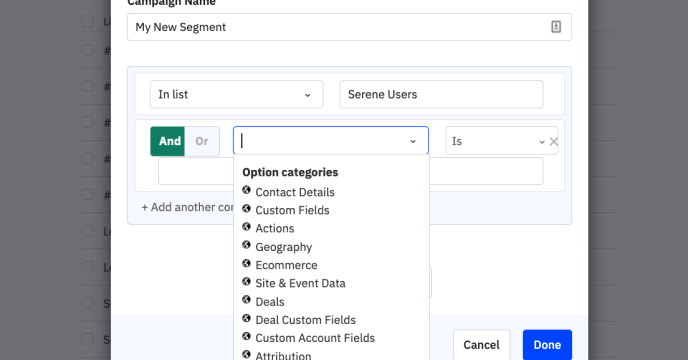 You can send an email campaign to a segment of your list in ActiveCampaign using logic filters
 4. Setup your templates
ActiveCampaign comes with a wide range of well-designed templates that you can use out of the box. If, however, you wish to import any custom branded templates that you were using in MailChimp now is a good time to import these.
You can either rebuild these using ActiveCampaign’s Email Designer, or you can copy and paste the HTML that you saved when you exported these from MailChimp.
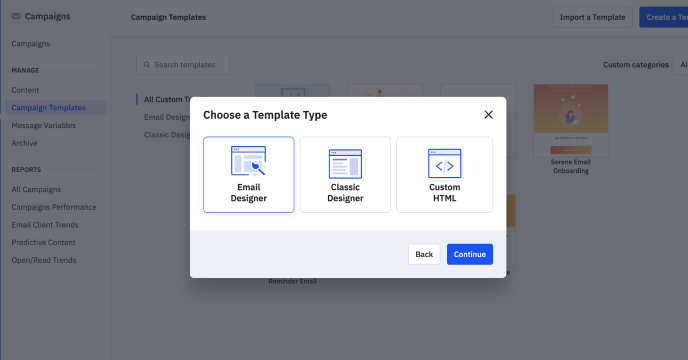 ActiveCampaign offers three ways to build custom email templates
 This is also a good time to upload any visual assets that you’ll likely want to use in your email campaigns. If you have a folder of logos, product images, and other brand assets you can import these by clicking “Content” in the left-hand menu.
Consider using message variables
Message variables allow you to
create a block of content in ActiveCampaign (e.g. an email header or
signature) that can be reused across multiple email campaigns. That way if
you update the message variable content it will update it across all email
campaigns.
If you have found this guide useful, please share it with your colleagues


